

Download BluEye64 Linux

to translate the page from Italian use the translator integrated in some browsers or a special tool.
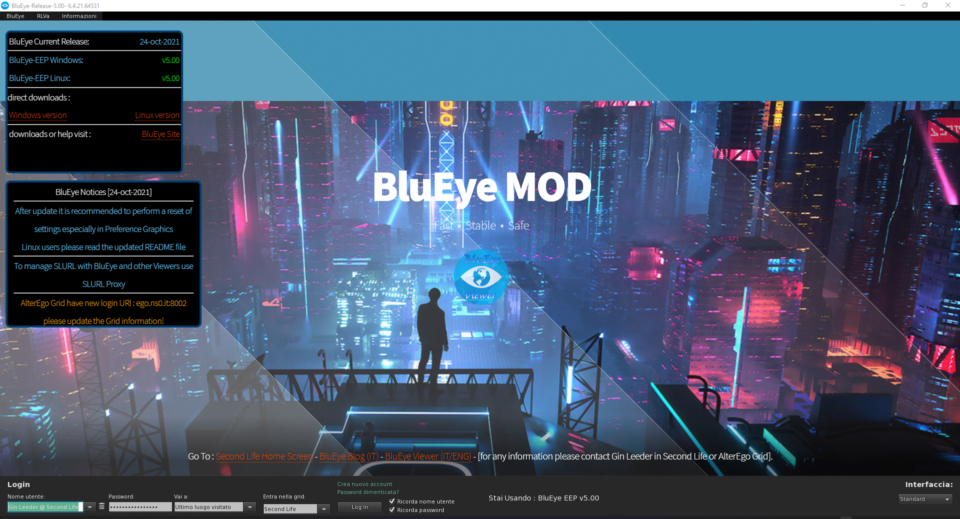
DOWNLOAD
BluEye EEP
30.10.2021 (EU)
blueye-linux_5.00.tar.xz :
MD5 : e8a3ddd0d339573caba17e97bc7a2832
SHA1 : 93ed13b92adae664a264e51cd3df749b38f54071
Shorten : https://cutt.ly/gRY1WXo
Previous versions download : v4.21
| BluEye EEP Linux | Configurazione minima consigliata | Configurazione Consigliata “Alta” |
|---|---|---|
| CPU | Intel i3 @2.0Ghz (AMD Equivalente) | Intel i5 @ 2.4Ghz (AMD Equivalente) |
| Scheda Grafica | GeForce GT 710 2GB (AMD Equivalente) | GeForce GTX 1050 Ti 4GB (AMD Equivalente) |
| Risoluzione | 1366*720 | 1920×1080 (FHD) |
| Memoria RAM | 4Gb | 8Gb |
| Disco Rigido | 3Gb di spazio libero | SSD con almeno 3Gb liberi |
| Dettaglio | livello dettaglio “medio” | livello dettaglio “Alto” |
| Sistema Operativo | Distribuzione Debian Based | Deepin 20 – Ubuntu 20.04/21.04 |
per maggiori informazioni, leggete il file README all’interno del pacchetto
2021/10/24 – Gin Leeder
Italiano
Guida ed Info su BluEye-Linux 5.00 FSMOD (LGPL)
Viewer per Second Life ed OpenSimulator
- Introduzione (Leggete è importante!) :
!Questa Guida è stata creata per aiutare gli utenti alle prime esperienze linux, per l’installazione sui sistemi derivati Debian. se già sai come installare un software su linux tramite riga di comando, passa al punto 3 per abilitare il Voice!
!RIMUOVI LA VERSIONE PRECEDENTE DI BLUEYE, E’ CONSIGLIATO! RIMUOVILA ANCHE MANUALMENTE SE SERVE!
!E’ PREFERIBILE RIMUOVERE ANCHE LE CARTELLE NASCOSTE CONTENENTI I DATI DI CONFIGURAZIONE PER FARE UNA INSTALLAZIONE PULITA (GENERALMENTE PRESENTI IN /home/[username]/.blueye64l_x64 ed in /home/[username]/.blueye<->_x64 dove [username] è il nome che hai scelto per il tuo account)!
BluEye Viewer per Linux nasce praticamente il 7 Luglio 2021, le info che seguono si basano su determinati fattori.
BluEye è sato testato su :
-Deepin Linux 20.2.4
-Ubuntu 20 ed Ubuntu 21
-Linux Mint 20
si consigliano le distribuzioni basate su Debian o derivate da Ubuntu stesso. Molti Tester di BluEye-Linux, oltre la versione Windows eseguita attraverso Wine o PlayOnLinux, hanno testato su questi sistemi il Viewer senza problemi.
Nessuna Garanzia è data per il software blueye-linux ed il suo corretto funzionamento sui sistemi Linux.
Il Featurable utilizzato è lo stesso presente in Windows (versione 33).
Le personalizzazioni nella configurazione base sono le stesse della versione Windows.
BluEye Linux è attualmente più performante con i driver NVidia propiretari, ed è più performante della versione Windows.
Si consiglia di personalizzare i comandi in modo che non vadano a scontrarsi con i comandi del sistema (CTRL+ALT+T per esempio)
BluEye è stato testato su :
-Deepin 20.2.4 con gli ultimi update di sistema.
-Ubuntu 20 e 21 con gli ultimi update di sistema.
-Linux Mint 20 con gli ultimi update di sistema.
Tutti i sistemi utilizzavano driver NVidia proprietari.
HW e Software :
-Processore Intel i7-4790S (Intel Turbo Boost disabilitato)
-Ram 8GB Crucial DDR3L.
-Scheda Video NVidia GeForce 1050TI 4GB (driver closed source NVidia 470.xx)
-Rete : 1000Kbs su Fibra misto Rame 200Mbps download e 20Mbps upload (stabile)
-SSD INTENSO da 512Gb
-Creative Sound Blaster Audigy FX.
Strumenti di monitoraggio sistema/risorse :
-BpyTOP (su tutte le distribuzioni)
-Gestore Attività di Deepin 20
-Psensor (su tutte le distribuzioni)
-Monitor Risorse (Linux Mint 20)
I Risultati sono soddisfacenti e a sorpresa BluEye con le stesse impostazioni e l’ultimo Featurable (versione 33) rende meglio e sfrutta meglio le risorse di sistema rispetto Windows con un incremento in FPS e maggiore stabilità generale senza rinunciare a nulla.
Ricordate che BluEye-Linux, proprio come per Windows, indipendentemente dalla qualità della macchina imposterà la grafica su “Alta” di default, starà a voi gestirla ed abbassarla su macchine meno performanti.
Installazione
- Disabilitare il Secure Boot.
E’ consigliato disabilitare attraverso il Bios il Secure Boot per avere, almeno su Deepin, un’installazione delle librerie scorrevole e semplice soprattutto evitando possibili errori o imprevisti vari.
In base al modello del vostro computer, entrate nel bios (in genere tasto “Canc” o “Del” o “ESC” oppure “F10” all’accensione del PC) e disabilitate l’avvio protetto.
- Installazione BluEye-Linux Viewer per Second Life ed OpenSimulator.
(se possiedi usi altre distribuzioni derivate da Ubuntu vai al punto 2.2)
2.1 DEEPIN 20 :
Aprite il terminale e tramite questo recatevi nella cartella che avete appena creato scompattando il file tar.xz contenente i file di BluEye-Linux (oppure per chi non sa come fare, semplicemente cliccare con il destro del mouse su un punto vuoto all’interno della cartella BluEye-Linux_5.00 o la cartella dove si è decompresso il file BluEye-Linux_5.00.tar.xz e scegliete “apri nel terminale”).
Per installare BluEye-Linux su Deepin ora semplicemente scrivete il seguente comando (rispettando le maiuscole) oppure fare un semplice “copia ed incolla” :
sudo ./Deepin20-install.sh
Partita l’installazione, vi sarà chiesta la posizione dove installare il software, ma se volete potete lasciare direttamente quella di default dove Deepin installa le app generalmente (opt/apps), quindi senza scrivere nulla premete semplicemente il tasto “invio” sulla tastiera (“return”) oppure indicate una posizione a vostra discrezione.
Al termine dell’installazione avrete fra le app del Luncher l’occhio blu di BluEye come icona, potrete già eseguire BluEye Viewer tuttavia il Voice non sarà ancora disponibile, per cui seguire il punto 3 della procedura d’installazione.
2.2 Ubuntu, Linux Mint e derivate (testato sulla 20 e la 21):
Aprite il terminale e tramite questo recatevi nella cartella che avete appena creato tramite la procedure di decompressione del file blueye-linux_5.00.tar.xz contenente i file di BluEye-Linux.
Per installare BluEye-Linux su Ubuntu semplicemente scrivete il seguente comando :
sudo ./install.sh
- Installazione di Wine e pacchetti per il Voice InWorld.
Vi Consiglio di installare comunque Wine nelle vostre distribuzioni anche se non necessario per il funzionamento del Viewer. Il processo richiede poco tempo e sarà veloce. All’interno del pacchetto ho incluso le istruzioni per Deepin 20, tuttavia è possibile seguire le istruzioni anche per altre distribuzioni oltre che per Deepin 20.
Ad oggi (2021-07-19) la versione che viene installata nel sistema è la 6.0.1 stable.
Wine vi consentirà di eseguire anche moltissime applicazioni native per Windows.
3.1 Installazione di Wine :
Su Deepin la procedura è molto semplice, ricordatevi di disabilitare il Secure Boot dal bios! intallare Wine su Deepin è consigliato senza dubbio alcuno.
Per installare Wine semplicemente aprite il terminale e copiate ed incollate (o riscrivete) i comandi dalla guida (in Inglese) presente nel file “deepin 20 – How to Install Wine on deepin 20.html” che dovrete aprire con il vostro browser web (ad esempio chrome o firefox), oppure andate alla pagina web https://wine.htmlvalidator.com/install-wine-on-deepin-20.html
Per le altre Distribuzioni, come Ubuntu o Linux Mint è possibile installare Wine direttamente dall app manager dei rispettivi sistemi, tuttavia in alcuni casi potrebbe essere installata la versione 4 di Wine, per questo meglioa ggiornare i repository ed installare l’ultima versione appunto la 6.
In alternativa per seguire le istruzioni tramite terminale e quindi avere la versione aggiornata per il vostro sistema, sarà sufficiente all’inizio della pagina web precedentemente indicata, quando aperta aperta cliccare sul tasto Home e quindi poi scorrendo verso il basso scegliere il sistema che utilizzate ed avrete una guida completa.
IMPORTANTE
Non copiate il simbolo $, ma soltanto il comando che ne segue! ad esempio troverete “$ sudo apt-get ” voi dovrete copiare ed incollare, o riscrivere, il comando dopo il simbolo “$ ” quindi da “apt-get” in poi rispettando gli spazi e le lettere maiuscole o minuscole.
Ho preferito includere la guida intera per non correre il rischio che il sito possa poi essere offline.
3.2 Installazione Librerie/Pacchetti per Voice dopo Wine (Deepin 20, Ubuntu, Linux Mint e derivate)
Per abilitare il voice sarà sufficiente aprire il terminale e digitare questo comando per ottenere le librerie necessarie (potete fare copia ed incolla se supportato dal sistema).
sudo apt-get install libidn11:i386 libuuid1:i386 libstdc++6:i386
Al termine dell’installazione sarà possibile utilizzare il voice InWorld scegliendo dal viewer i driver “Alsa”.
4 Installare Controller (JoyPad) Compatibile XBOX
- Questa Procedura è stata testata e subito funzionate su Deepin 20.2.4 e non è stata da me direttamente provata su altre distribuzioni!*
I controller su Linux sono sempre stati un po ‘complicati. Non ci dovrebbe essere alcun motivo per cui non dovrebbe funzionare, ma potrebbe richiedere un processo di configurazione non complicato e nemmeno molto lungo. Avrai bisogno di un driver.
Xpad o xboxdrv esistono per raggiungere questo obiettivo.
I controller Xbox One dovrebbero essere “noti” e questo aumenta la necessità di modificare manualmente i file di configurazione.
4.1 Per prima cosa, installa il driver del kernel xpad.
Esegui il seguente comando :
sudo apt-get install xpad
A questo punto, puoi provare a connettere il controller e vedere se riesci a mappare i controlli nel Viewer o in un videogioco.
Su Deepein 20.2.2 da me testato, il controller è stato immediatamente riconosciuto e funzionante sin da subito.
4.2 Se ciò non funziona (o si preferisce una maggiore personalizzazione) installare xboxdrv
Esegui il comando
sudo apt-get install xboxdrv
Quindi caricare il modulo (aggiungendo il parametro per disabilitare xpad, se è stato caricato)
sudo xboxdrv –detach-kernel-driver
Quindi prova a mappare i tuoi controlli nel Viewer od in un videogioco.
Per Guide ed Informazioni registrati sul BluEye Blog https://blueye-it.org/
Iscrivetevi al gruppo BluEye in Second Life ed AlterEgo Grid
Mandate una Notecard a Gin Leeder (Second Life – AlterEgo Grid avatr name)
English (DeepL translator www.DeepL.com/Translator)
Guide and Info about BluEye-Linux 5.00 FSMOD (LGPL)
Viewer for Second Life and OpenSimulator
- Introduction (Read is important!) :
*This guide is designed to help first time users with linux installation on Debian derived systems. If you already know how to install software on linux via command line, skip to step 3 to enable Voice!
*!REMOVE THE PREVIOUS VERSION OF BLUEYE, IT’S RECOMMENDED! REMOVE IT MANUALLY IF YOU NEED TO!
*!IT IS PREFERABLE TO REMOVE ALSO THE HIDDEN CARDLES CONTAINING THE CONFIGURATION DATA TO MAKE A CLEAN INSTALLATION (GENERALLY PRESENT IN /home/[username]/.blueye64l_x64 and in /home/[username]/.blueye<->_x64 where [username] is the name you have chosen for your account)!
BluEye Viewer for Linux was practically born on July 7, 2021, the following info is based on certain factors.
BluEye has been tested on :
-Deepin Linux 20.2.4
-Ubuntu 20 and Ubuntu 21
-Linux Mint 20
we recommend distributions based on Debian or derived from Ubuntu itself. Many BluEye-Linux Testers, besides the Windows version run through Wine or PlayOnLinux, have tested the Viewer on these systems without problems.
No Guarantee is given for the blueye-linux software on its correct functioning on Linux systems.
The Featureble used is the same as in Windows (version 33).
The customizations in the basic configuration are the same of the Windows version.
BluEye Linux is currently more performant with NVidia drivers than the Windows version.
It is advisable to customize the commands so that they do not clash with the system commands (SUPER+ALT+T for example).
BluEye has been tested on :
-Deepin 20.2.4 with the latest system updates.
-Ubuntu 20 and 21 with the latest system updates.
-Linux Mint 20 with the latest system updates.
All systems used proprietary NVidia drivers.
HW and Software :
-Intel i7-4790S processor (Intel Turbo Boost disabled)
-Ram 8GB Crucial DDR3L.
-Video Card NVidia GeForce 1050TI 4GB (closed source NVidia 470.xx driver).
-Network: 1000Kbs on Fiber Mixed Copper 200Mbps download and 20Mbps upload (stable)
-INTENSE 512Gb SSSD
-Creative Sound Blaster Audigy FX.
System/resource monitoring tools :
-BpyTOP (on all distributions)
-Deepin 20 Activity Manager
-Psensor (on all distributions)
-Resource Monitor (Linux Mint 20)
The results are satisfactory and surprisingly BluEye with the same settings and the latest Featurable (version 33) performs better and uses the system resources better than Windows with an increase in FPS and greater overall stability without sacrificing anything.
Remember that BluEye-Linux, just like Windows, regardless of the quality of the machine will set the graphics to “High” by default, it will be up to you to manage it and lower it on less performing machines.
Installation
- Disable Secure Boot.
It is recommended to disable through the Bios Secure Boot to have, at least on Deepin, a smooth and easy installation of libraries especially avoiding possible errors or various unexpected events.
Depending on the model of your computer, enter the bios (usually key “Canc” or “Del” or “ESC” or “F10” when you turn on the PC) and disable the secure boot.
- Install BluEye-Linux Viewer for Second Life and OpenSimulator.
(if you have uses other distributions derived from Ubuntu go to point 2.2)
2.1 DEEPIN 20 :
Open the terminal and through this go to the folder you have just created unzipping the tar.xz file containing the BluEye-Linux files (or for those who do not know how to do this, simply right-click on an empty spot inside the BluEye-Linux_5.00 folder or the folder where you unzipped the BluEye-Linux_5.00.tar.xz file and choose “open in terminal”).
To install BluEye-Linux on Deepin now simply type the following command (case sensitive) or do a simple “copy and paste” :
sudo ./Deepin20-install.sh
Start the installation, you will be asked for the location where to install the software, but if you want you can leave directly to the default location where Deepin installs apps generally (opt/apps), then without writing anything simply press the “enter” key on the keyboard (“return”) or indicate a location at your discretion.
At the end of the installation you’ll have the blue eye of BluEye as icon in the Luncher apps, you can already run BluEye Viewer but the Voice will not be available yet, so follow step 3 of the installation procedure.
2.2 Ubuntu, Linux Mint and derivatives (tested on 20 and 21):
Open the terminal and through this go to the folder you just created through the decompression procedure of the file blueye-linux_5.00.tar.xz containing the BluEye-Linux files.
To install BluEye-Linux on Ubuntu simply type the following command :
sudo ./install.sh
- Installing Wine and packages for Voice InWorld.
I recommend that you install Wine in your distribution anyway, even if it’s not necessary for the Viewer to work. The process takes little time and will be fast. Inside the package I’ve included instructions for Deepin 20, however you can also follow the instructions for other distributions besides Deepin 20.
As of today (2021-07-19) the version that is installed on your system is 6.0.1 stable.
Wine will also allow you to run many native Windows applications.
3.1 Installing Wine :
On Deepin the procedure is very simple, remember to disable Secure Boot from the bios! installing Wine on Deepin is recommended without any doubt.
To install Wine simply open the terminal and copy and paste (or rewrite) commands from the guide (in English) in the file “deepin 20 – How to Install Wine on deepin 20.html” that you should open with your web browser (such as chrome or firefox), or go to the web page https://wine.htmlvalidator.com/install-wine-on-deepin-20.html
For other distributions, such as Ubuntu or Linux Mint you can install Wine directly from the app manager of their respective systems, but in some cases may be installed version 4 of Wine, so it is better to update the repositories and install the latest version 6.
Alternatively to follow the instructions via terminal and then have the updated version for your system, will be sufficient at the beginning of the web page previously indicated, when open click on the Home button and then scrolling down to choose the system you use and you will have a complete guide.
IMPORTANT
Do not copy the symbol $, but only the command that follows! for example you will find “$ sudo apt-get ” you must copy and paste, or rewrite, the command after the symbol “$ ” then from “apt-get” onwards respecting spaces and upper or lower case letters.
I’ve preferred to include the whole guide in order not to run the risk that the site could be offline.
3.2 Installing Libraries/Packages for Voice after Wine (Deepin 20, Ubuntu, Linux Mint and derivatives)
To enable the voice will be sufficient to open the terminal and type this command to get the necessary libraries (you can copy and paste if supported by the system).
sudo apt-get install libidn11:i386 libuuid1:i386 libstdc++6:i386
At the end of the installation you will be able to use the voice InWorld, Select from Preferences —> Voice tha Alsa driver.
4 Install XBOX Compatible Controller (JoyPad)
- This Procedure has been tested and immediately worked on Deepin 20.2.2 and has not been directly tested by me on other distributions! *
Controllers on Linux have always been a bit complicated. There should be no reason why it shouldn’t work, but it may require an uncomplicated and not very lengthy setup process. You will need a driver.
Xpad or xboxdrv exist to achieve this.
Xbox One controllers should be “known” and this increases the need to manually edit configuration files.
4.1 First, install the xpad kernel driver.
Run the following command:
sudo apt-get install xpad
At this point, you can try connecting the controller and see if you can map the controls in the Viewer or in a video game.
On Deepein 20.2.2 I tested, the controller was immediately recognized and working right away.
4.2 If that doesn’t work (or you prefer more customization) install xboxdrv
Run the command
sudo apt-get install xboxdrv
Then load the module (adding the parameter to disable xpad, if it has been loaded)
sudo xboxdrv –detach-kernel-driver
So try mapping your controls in the Viewer or in a video game.
For Guides and Information register on the BluEye Blog https://blueye-it.org/
Join the BluEye group in Second Life and AlterEgo Grid
Send a Notecard to Gin Leeder (Second Life – AlterEgo Grid avatr name)
Translated with www.DeepL.com/Translator (free version)